
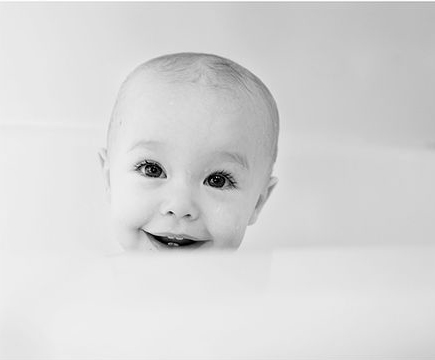
I broke out my speedlight yesterday and started practicing with it. I have something big in the works for which I may need it and I haven’t used it in awhile and the last time I tried it wasn’t always firing. Turns out there was a ton of crud in the hot shoe and once I cleaned that out it worked fine. So I shot some photos of Simon in the bath. Then I made this story board.
I found this cool software called screencap it allows you to make a video of what you are doing on your computer. I downloaded the trial and made the following tutorial on how to make the above story board. This is my first time doing this so you will have to excuse my novice attempt. I just used the microphone in my laptop – not an external one consequently you pick up a lot of background noise with the fan – but you can still hear me. next time I will try an external mic. Also this is the demo version of the software so you see a little moving watermark. It’s also really low quality so I am not sure it this will really help a whole lot because it is kind of hard to see which tool I am using. but mainly its the Move too (arrow) and the text tool.
Here is the video
making a story board tutorial from Emily Weaver Brown on Vimeo.
These are the steps that I took
1) open up the photos and elements that you are going to use
2) open a new document (in this case 10×20 story board)
3) drag and drop photos onto new document use the command +T function to resize images. Position images as desired.
4) add new layer for blue lines
5) edit > stroke to add lines (these were done at 20px) color will be whatever color is in your foreground pallet.
6) add upper text – drag it into position
7) go to the layer with blue lines and erase back line where it runs through text.
8 Add text that will run along side (Splish Splash)
9) rotate text using command + T, move into position
10) drag on duck element and position
11) use the paint bucket to paint the background white
12) flatten layers
and here are some more photos of Simon
I also took a really cute video of him in the bath the night before – unfortunately it needs some censorship which I can’t do in imovie 6 without purchasing a plugin. I am considering instead just upgrading to imovie 9 but I can’t tell if it has a blur effect either. If someone has imoive 9 and knows wether or not it can censor things will you let me know?
Portfolio | Contact Me | Book a Session .
.

SO cute!! LOVE these photos so much. Those videos are so awesome…what a help to hear it and SEE it. very cool. The only suggestion I have for imovie and I am guessing you probably already know and it wont work..but with the bath video of Lacy’s I posted, I cropped a portion of the video where I needed to hide the x-rated part:) I think it did alter the quality a little, but it was not too bad. That’s all I have for now.
My flash and I are trying to become friends which is not happening so fast. You did well. Thanks for sharing how to make the story board!
These photos are all so adorable! I absolutely love, love, love the photo under “Simon loves his bath” It looks like he’s getting so big.
Thank you so much for the tutorial, it was so easy to follow and I was able to make my own storyboard without any frustration. I hope you are planning more tutorials in the future. Once again thanks so much….. Also your photography is great!!!